
1.use IphotoDVD generate VCD/SVCD compatible Mpeg files.
Home-IphotoDVD-DVD/VCD/SVCD
Photo Slide Show-Make VCD/SVCD Photo Slide Show
There are 5 steps to generate a VCD/SVCD (use
NERO,
IphotoDVD
and CD writer)
Below show you how to make a VCD/SVCD using my photos when I traveled in Quebec, Canada.
1.use IphotoDVD generate VCD/SVCD compatible Mpeg files.
|
|
View the Flash Demo of IphotoDVD �� |
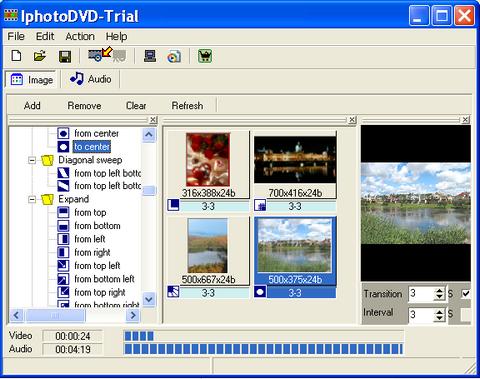 |
I have taken a lot of pictures when I travel in Quebec
Canada, to add them to IphotoDVD and generate some VCD/SVCD mpeg
files is not a difficult job.
2.ADD
the Mpeg files to NERO Express.
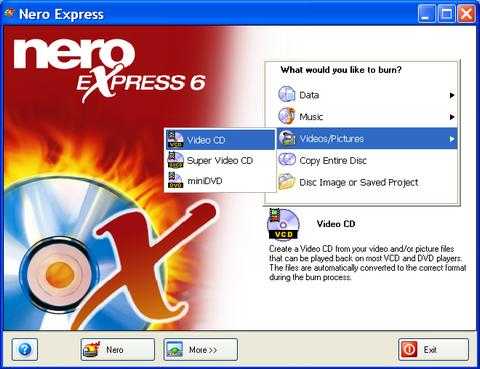 |
The above picture is the main form of Nero express.
 |
Enable VCD/SVCD menu (marked with
![]() ), click on the button
'Add' (marked with
), click on the button
'Add' (marked with ![]() ) to
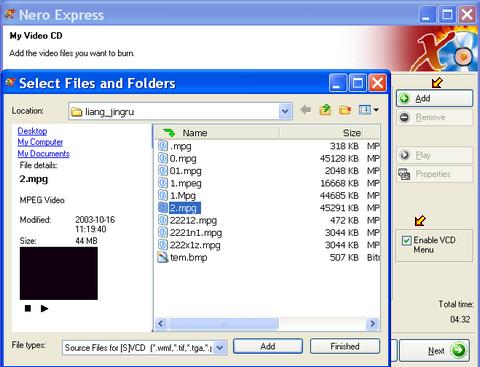
add the mpeg files you generated using IphotoDVD
) to
add the mpeg files you generated using IphotoDVD
3.Set the display picture and title of each
mpeg file.
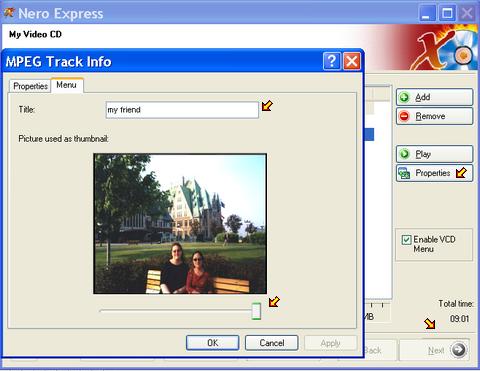 |
Having added the mpeg files, you click on the button
'Properties'( marked with
![]() )
to show the form 'Mpeg track Info',
)
to show the form 'Mpeg track Info',
fill the title of the mpeg file, in the picture above is 'my friend' and adjust
track bar (marked with ![]() )
to choose the display thumbnail picture/frame of the mpeg file on the future's menu
interface.
)
to choose the display thumbnail picture/frame of the mpeg file on the future's menu
interface.
Then Click on the button 'Next' (marked with
![]() )
to design the menu interface of VCD/SVCD/DVD
)
to design the menu interface of VCD/SVCD/DVD
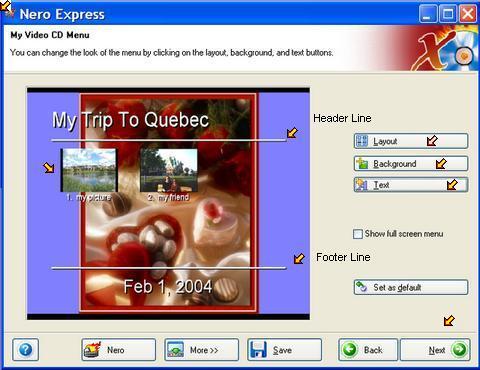
4.Design the menu interface of VCD/SVCD/DVD
 |
a. the layout of your VCD/SVCD
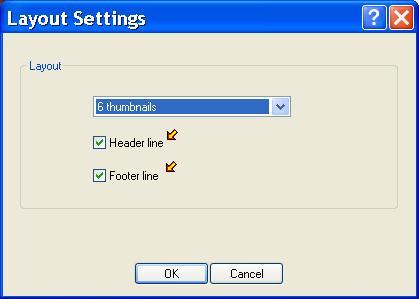 |
Click on the button 'Layout' to make sure you check/uncheck the Header Line and Footer Line.
b. set the background
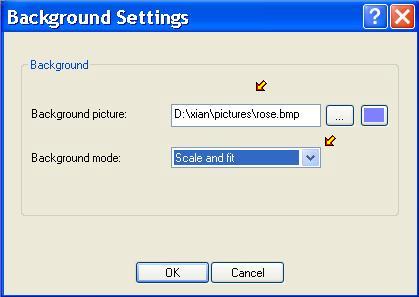 |
Click on the button 'Background' to choose the menu
background picture and background color.
c. set the text
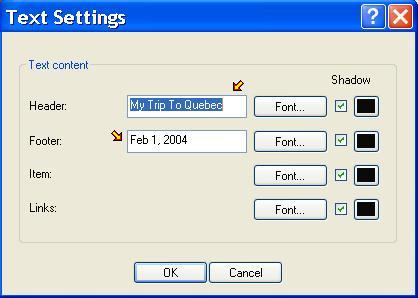 |
Click on the button 'Text' to fill the Header and Footer
text. In the picture aboce, I fill 'My Trip To Quebec' and 'Feb 1, 2004'.
Then click on the button 'Next' (marked with
![]() )
in the menu design interface.
)
in the menu design interface.
5.Burn the VCD/SVCD file to CD-ROM
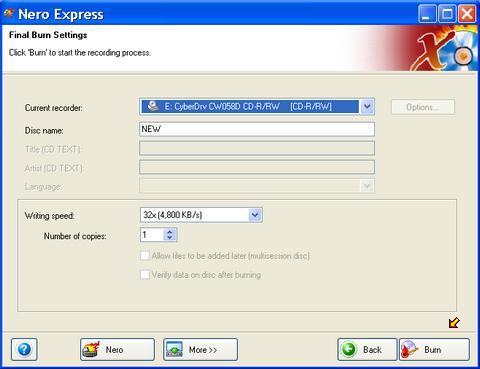 |
Insert the blank CD/DVD disk to your CD-ROM then
click on the button 'Burn' (marked with
![]() ) to burn the VCD/SVCD file to CD-ROM
) to burn the VCD/SVCD file to CD-ROM
Congratulation,
you have made your photo VCD/SVCD.
